 Save
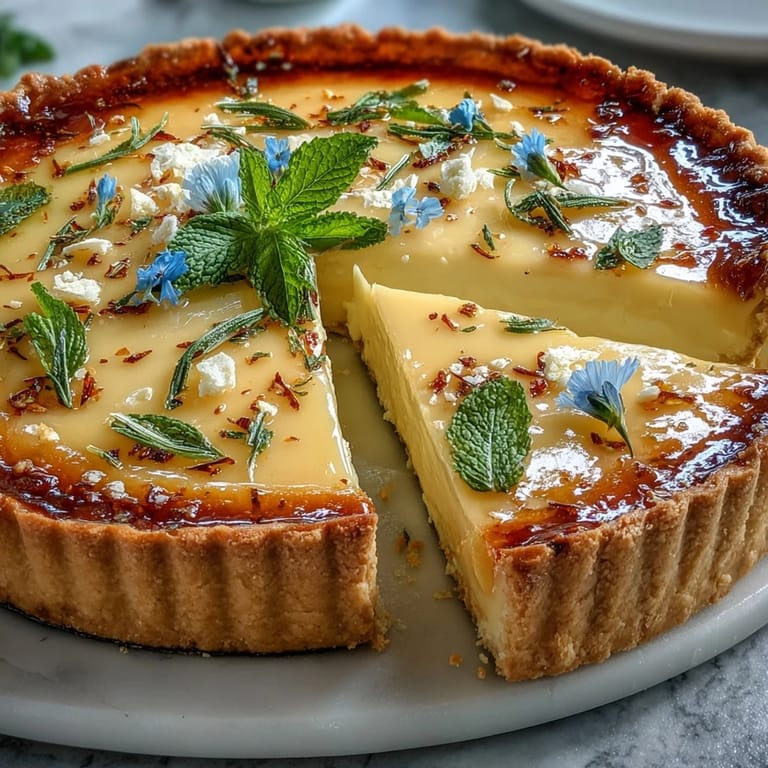
Save Sunlight poured through my kitchen window one April afternoon and I couldn't resist the call of lemons that had been perfuming the counter for days. I wanted something that would taste like biting into the very heart of spring. With my favorite apron dusted from flour and gentle music in the background, I decided to tackle this lemon curd tart—hoping for both elegance and a bit of adventure. What started as an experiment quickly turned into a delight as the bright, zesty aroma filled the kitchen. The result was a dessert almost too beautiful to cut into, until we did—forks at the ready.
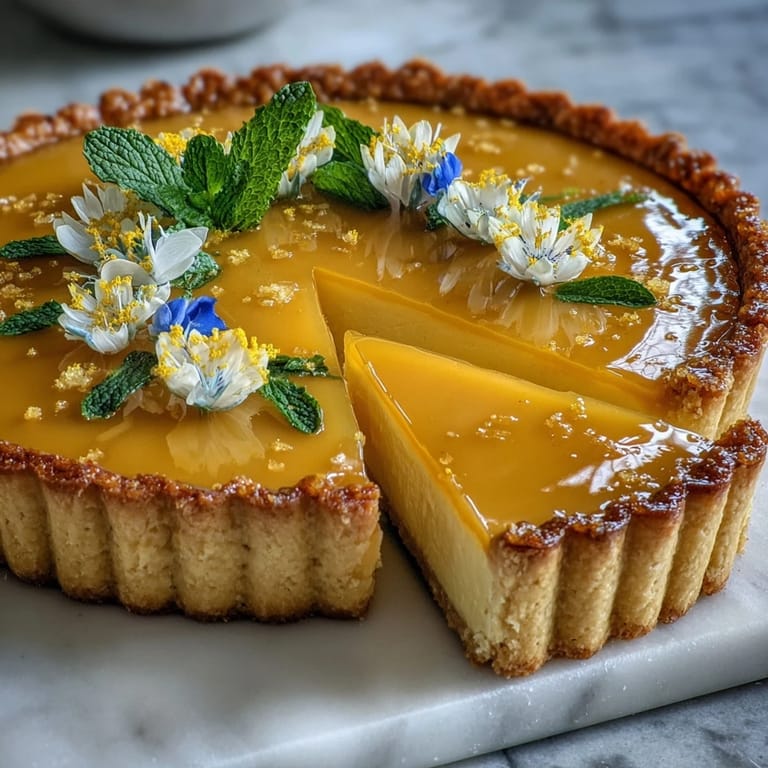
I remember the calm right before guests arrived for a small spring gathering, hands sticky from zest and a touch of flour smudged on my cheek, as I gently placed the last violet on top. It made the whole room feel more festive, not just because it was pretty, but thanks to the shared excitement over dessert still chilling in the fridge.
Ingredients
- All-purpose flour: This is the backbone of the tart shell—a gentle touch when pulsing it with butter keeps things tender.
- Unsalted butter: Work quickly with cold cubes; they'll create those sought-after flaky layers in your crust.
- Powdered sugar: Adds just the right sweetness and a hint of melt-in-the-mouth texture.
- Egg yolk: Bringing richness and structure, this helps bind your tart shell without making it tough.
- Cold water: Add it slowly, just until the dough comes together—I’ve learned less is more.
- Salt: Don’t skip this—it brightens both the shell and the filling in ways you’ll taste with each bite.
- Eggs: These give the lemon curd its luscious, silky thickness.
- Granulated sugar: The perfect way to balance the sharpness of fresh lemon juice and zest.
- Lemon zest: Tiny flecks of zest pack bold flavor; I use a microplane and watch for only the yellow, never the white pith.
- Lemon juice: Freshly squeezed is everything here—those bottled ones just don’t have the same kick.
- Unsalted butter (for curd): Adds that final glossy finish and makes the curd extra smooth.
- Edible flowers: The easiest, most celebratory finishing touch—make sure they’re food-safe, not just pretty.
- Fresh mint leaves (optional): I love the pop of green and the gentle fragrance, but leave them out if you prefer pure citrus flair.
Tired of Takeout? 🥡
Get 10 meals you can make faster than delivery arrives. Seriously.
One email. No spam. Unsubscribe anytime.
Instructions
- Mix the tart dough:
- Toss flour, powdered sugar, and salt into a food processor, then pulse until everything looks like fresh snow. Quickly toss in cold cubes of butter and pulse until you see pea-sized clumps forming—promise yourself you won’t overwork it.
- Bring the dough together:
- Add the egg yolk and a splash of cold water, pulsing just until the dough barely holds. Pull it out, shape it into a disk, wrap it up, and let it rest in the fridge for at least 30 minutes.
- Shape and chill the crust:
- Roll the dough onto a floured surface until it’s wide enough for your tart pan—if it tears, just patch it and keep rolling. Press it into the pan, trim the edges, chill again, and prick holes with a fork for steam to escape.
- Blind bake:
- Line the shell with parchment, fill with pie weights or beans, and bake in a hot oven until set at the edges. Remove the weights, let it finish golden-browning (and the kitchen fills with buttery aroma), then cool completely.
- Make lemon curd:
- Whisk eggs, sugar, zest, and juice in a saucepan over gentle heat. Stir constantly until the curd thickens to nappe consistency—don’t let it boil or it’ll go lumpy—then pull off the heat and whisk in butter until glossy and smooth.
- Strain and cool:
- Push the curd through a fine sieve for ultimate silkiness. Let it cool to room temperature, resisting the urge to sneak a spoonful (okay, maybe just one).
- Assemble and chill:
- Pour the cooled curd into the baked tart shell, smoothing it out to the edges. Chill at least an hour so everything sets to that sliceable, swoon-worthy state.
- Decorate and serve:
- Just before serving, scatter edible flowers and mint as you please—every slice turns into a little bouquet. Set slices on plates, brew some tea or pour something bubbly, and enjoy immediately.
 Save
Save My favorite memory of this tart comes from a picnic under cherry blossoms, when we ended up eating it straight from the pan because no one had remembered plates. Sticky fingers were no match for laughter and lemony bites.
Let’s Talk About Crunch
I once let the shell bake just a minute longer—worried it might get too dark—but it actually added a gorgeous crispness that contrasted with the creamy curd. For a more biscuit-y vibe, make sure your oven is fully preheated and don’t skimp on the final minutes of baking.
Zesting Tips That Changed My Game
The first time I used a microplane for lemon zest, I realized how essential it is to avoid the bitter white pith. A little patience here gives you pure citrus perfume, and the payoff comes through in every silky mouthful.
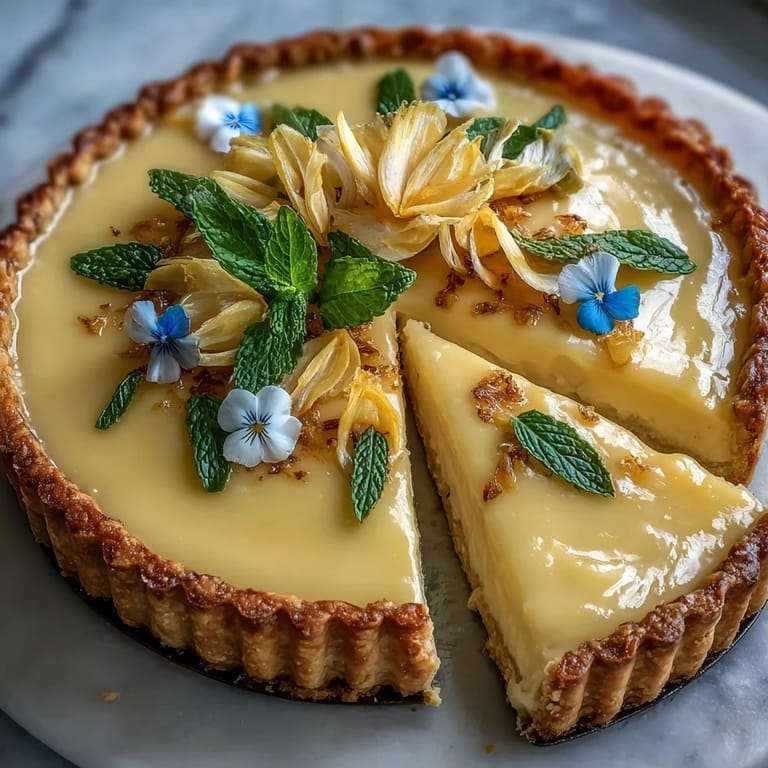
Finishing Touches That Impress
Layering edible flowers on top always turns this tart into a centerpiece, like something plucked straight from a garden party dream. I sprinkle a few mint leaves at the last moment for a fresh fragrance, and if it’s a special crowd, a little edible glitter never hurts.
- Don’t decorate until just before serving to keep flowers perky and vibrant.
- Pair with soft whipped cream for a little extra luxury on each plate.
- If slicing ahead, wipe your knife between cuts for flawless presentation.
 Save
Save This tart is proof that a little patience, fresh citrus, and a handful of flowers can bring an afternoon to life. Here’s to moments that look as good as they taste—enjoy every last bite.
Recipe Questions & Answers
- → Why blind bake the tart shell?
Blind baking firms the crust so it stays crisp when filled with a moist curd. We bake with parchment and weights to prevent shrinking and ensure an evenly golden shell.
- → How do I know when the lemon curd is done?
Cook the curd over medium-low heat, whisking constantly until it thickly coats the back of a spoon. It should hold a clear line when you run your finger through the coating.
- → Can I make the curd ahead of time?
Yes. Lemon curd can be made a day ahead and chilled. Rewarm briefly to loosen before pouring into the shell if needed, or bring to room temperature for easier spreading.
- → What can I use instead of a food processor for the pastry?
Use a pastry blender or two knives to cut cold butter into the flour until coarse crumbs form, then bring together with the yolk and cold water as directed.
- → Are edible flowers safe to use?
Only use flowers labeled edible and pesticide-free. Popular choices include violets, pansies and nasturtiums. Rinse gently and pat dry before arranging on the tart.
- → How can I make this gluten-free?
Substitute a 1:1 gluten-free flour blend for the all-purpose flour and chill the dough thoroughly. Texture may vary slightly, so handle gently to avoid overworking.