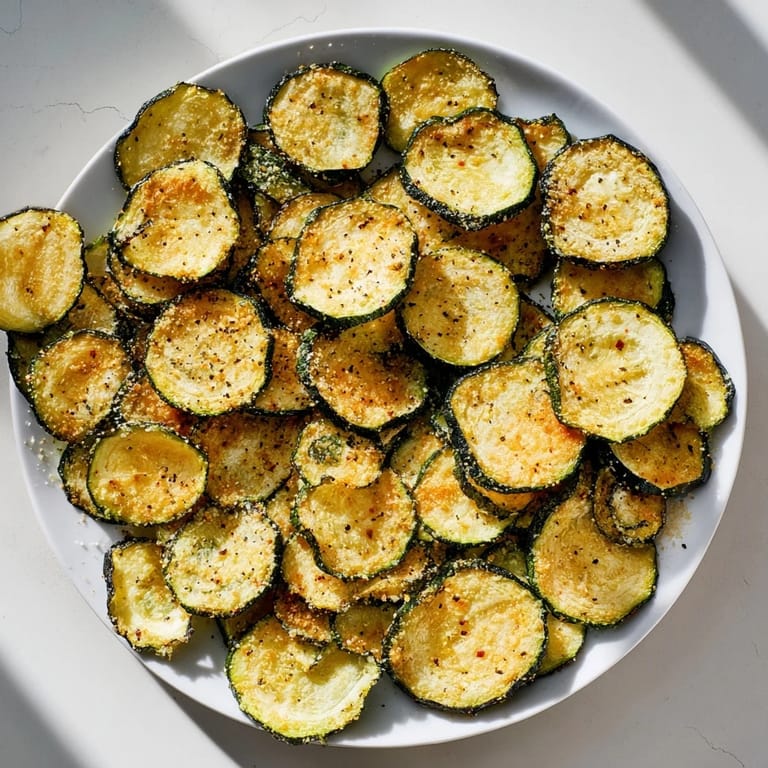
 Save
Save My kitchen timer went off at the worst possible moment—I was on a phone call, my hands covered in zucchini juice, and somehow I'd managed to slice my thumb instead of the vegetable. That's when my roommate laughed and suggested we actually finish making the snack I'd started three days earlier. What came out of the oven that afternoon was crispy, golden, and so addictively crunchy that we ate the entire batch in minutes, forgetting all about the bandage on my hand.
I brought a batch to a game night expecting no one to touch them, but they disappeared before the opening credits finished rolling. My friend Marco grabbed another handful and said, "Wait, these are just zucchini?" The look on his face when I confirmed it was pure gold—he'd been genuinely convinced they were some fancy store-bought snack.
Ingredients
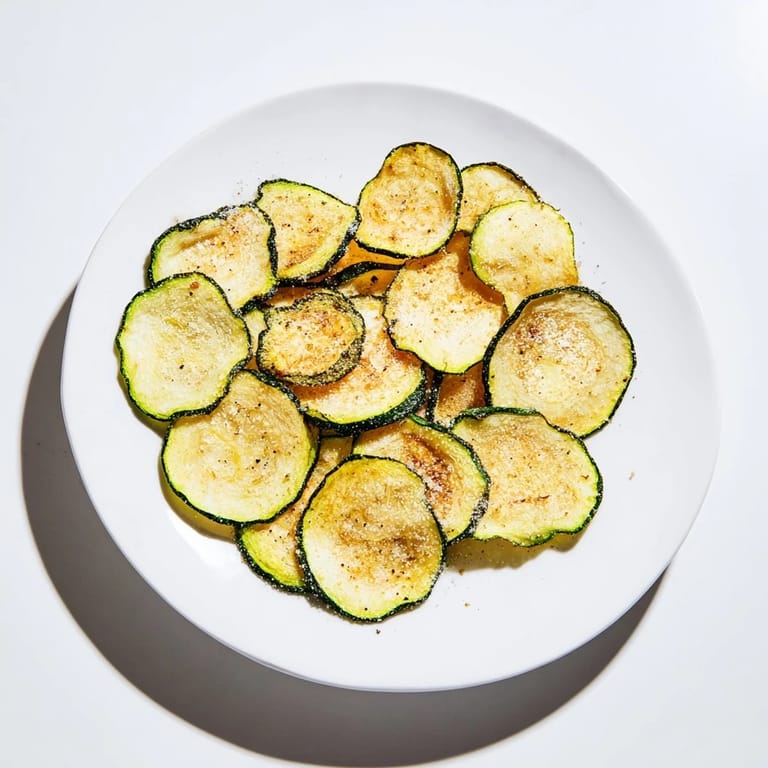
- Zucchinis (2 medium): Fresh, firm ones work best; avoid any that feel mushy or have soft spots, as they won't crisp up properly.
- Olive oil (1 tablespoon): A light coating is all you need—too much will make them greasy rather than crispy.
- Sea salt (1/2 teaspoon): The salt draws out moisture, which is honestly the secret to crispiness everyone misses.
- Freshly ground black pepper (1/4 teaspoon): Ground fresh tastes brighter and less stale than pre-ground.
- Garlic powder (1/2 teaspoon, optional): Adds a savory depth that makes you forget these are vegetables.
- Smoked paprika (1/2 teaspoon, optional): A pinch gives a subtle warmth without overwhelming the delicate zucchini flavor.
Tired of Takeout? 🥡
Get 10 meals you can make faster than delivery arrives. Seriously.
One email. No spam. Unsubscribe anytime.
Instructions
- Heat your oven low and slow:
- Set it to 225°F and line two baking sheets with parchment paper. This low temperature is crucial—high heat will cook the outside before the inside dries out, and you'll end up with chewy disappointment instead of chips.
- Prep your zucchini with care:
- Wash them thoroughly, pat them completely dry (moisture is your enemy here), and slice them into thin, even rounds about 1/8 inch thick. A mandoline makes this easier, but a sharp knife works fine if you take your time.
- Remove every drop of excess water:
- Pat each slice down with paper towels—seriously, don't skip this step. It makes the difference between soggy and spectacular.
- Season gently and evenly:
- Toss the slices in a bowl with olive oil, salt, pepper, and any optional seasonings you're using. Make sure every slice gets coated, but avoid clumping them all in the center.
- Arrange without overlap:
- Spread them out in a single layer on the parchment, leaving space between each slice so hot air can circulate freely.
- Bake with patience:
- After the first hour, rotate the baking sheets and flip the chips, then bake another 30–40 minutes until they're golden and truly crispy when you pick one up.
- Cool completely:
- Leave them on the sheets—this is when the magic happens and they firm up even more. Eat them right away for maximum crunch, or store in an airtight container for up to two days.
 Save
Save There's something almost meditative about watching these transform from pale green slices into actual chips. My partner wandered into the kitchen halfway through, smelled the faint roasted vegetable scent, and didn't believe me when I said what was in the oven—somehow zucchini feels like it shouldn't be allowed to taste this good.
Flavor Variations That Actually Work
The beauty of this recipe is how the base technique stays the same while the flavor story completely changes. I've had the best luck with smoked paprika and garlic, but don't sleep on chili powder for a kick or Italian herbs for something more savory. Nutritional yeast is unexpectedly fantastic if you want that umami savory depth—it sounds weird until you try it and realize you've just invented a better-tasting chip.
The Crispiness Factor: Why Yours Might Be Different
Every oven runs a little differently, and humidity in your kitchen affects how fast the zucchini dries out. If your first batch comes out a tiny bit soft, add 10 more minutes to the second bake time. If they're getting too dark before they're crispy, your oven might run hot—lower the temperature by 15 degrees and add a few minutes. Think of it like learning to drive someone else's car; the basic rules stay the same, but you adjust to the personality of the machine.
Storage and Serving Ideas
The day you make them is when they'll be crispiest, but they'll stay good for two days in an airtight container—after that they start to lose their snap. I serve them room temperature as a snack, but they're also surprisingly good next to a salad or alongside eggs for breakfast. One discovery I made by accident: grating a little Parmesan over them before they finish baking takes them from good to genuinely irresistible.
- Try a light sprinkle of Parmesan in the last 15 minutes of baking for a cheesy version that tastes indulgent.
- Make them ahead for parties and keep them in a container with parchment between layers so they don't get squished.
- If they do soften up after a day, a quick 5-minute toast in a 300°F oven will bring the crunch back.
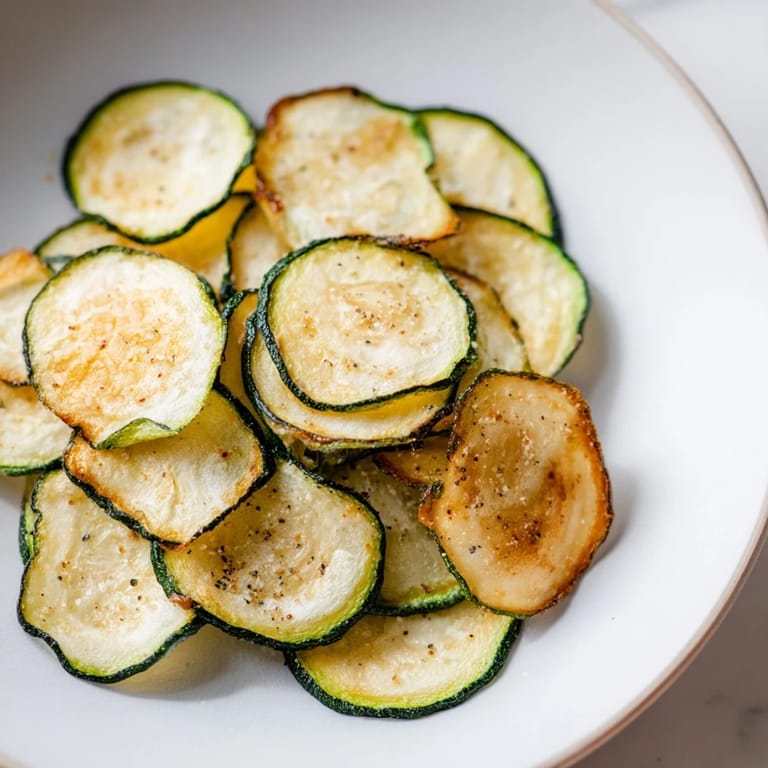
 Save
Save What started as a way to use up zucchinis before they went bad turned into my go-to snack that actually feels healthy. There's real joy in eating something crispy and delicious that doesn't leave you feeling guilty, and these chips prove that healthy food doesn't have to taste like punishment.
Recipe Questions & Answers
- → How do I achieve maximum crispiness for zucchini chips?
Ensure the zucchini slices are thin and very dry before seasoning. Baking at a low temperature for a longer time helps remove moisture evenly, resulting in crisp texture.
- → Can I add other seasonings to these chips?
Yes, options like smoked paprika, chili powder, garlic powder, or Italian herbs work well to enhance the flavor profile.
- → What tools are needed to prepare crispy zucchini chips?
A sharp knife or mandoline for thin slicing, mixing bowl for tossing, parchment-lined baking sheets, and paper towels to dry slices.
- → How should I store leftover zucchini chips?
Store them in an airtight container at room temperature and consume within 1-2 days to maintain crunchiness.
- → Are these chips suitable for special diets?
Yes, they are vegetarian, gluten-free, and low carb, making them appropriate for many dietary preferences.